
You wash your Model Y, step back to admire the shine, and then you see it. The bottom of your rear doors looks like it has been shot with a shotgun. Dozens of tiny white speckles where the paint is missing.
This isn’t bad luck; it is a design flaw. The Tesla Model 3 and Y have a “Coke Bottle” shape—the front tires stick out slightly, and the rear doors flare out wide. This creates a perfect trajectory for your front tires to launch rocks, sand, and road salt directly at your own rear paint.
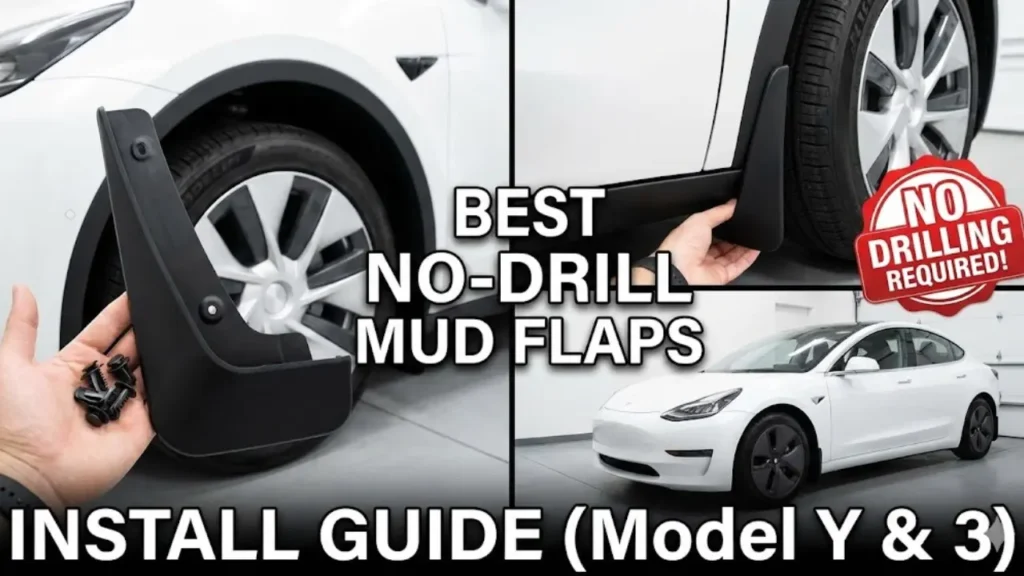
If you are looking for the best mud flaps for Tesla Model Y/3 to stop this self-inflicted damage, you have come to the right place. We tested the top “no-drill” options to save your paint.
You don’t need to drill holes in your car. Modern mud flaps use existing clips.
- Best Overall (Easy Install): Basenor / Spigen Mud Flaps. Rigid plastic, matches factory trim, installs in 10 mins.
- Best Protection (Heavy Duty): Rally Armor. Flexible urethane, expensive ($150+), but won’t crack on speed bumps.
- Budget Pick: Nansure / Generic ABS. Looks like OEM but covers more area for under $30.
Why Tesla Doesn’t Include Them (Usually)
In many regions (like California), Teslas are delivered without mud flaps. Why? Aerodynamics.
Mud flaps create drag (air resistance), which can slightly reduce the EPA estimated range. However, the real-world range loss is negligible (maybe 1-2 miles per charge), whereas the paint damage from not having them is severe and expensive to fix.
If your rocker panels (the bottom side skirts) or rear doors are already peppered with white chips, installing mud flaps now will only prevent future damage.
Before you install the flaps, we highly recommend touching up the existing chips to prevent rust. Read our guide on How to Fix Tesla Rock Chips DIY to restore your paint first.
Once your paint is sorted, it is time to choose the right shield. Not all mud flaps are created equal—some are rigid plastic that scrapes on every driveway, while others are flexible rubber.
Option 1: The Tesla OEM Kit (The “Safe” Choice)
Tesla sells its own mud flaps on the official shop for about $40. They look perfectly integrated because they were designed by the same team that built the car.
The Problem: They are too short. To avoid aerodynamic drag, Tesla made them very stubby. While they protect the rocker panel directly behind the front wheel, they often fail to stop rocks from hitting the flared rear doors. Also, they are made of rigid plastic that traps dirt against the paint.
Option 2: Aftermarket “No-Drill” Flaps (The Winner)
Brands like Basenor, Spigen, or Rally Armor have solved Tesla’s design flaw. They are slightly wider and longer, offering about 40% more coverage area.
Rigid vs. Flexible:
Most cheap kits ($30) are Rigid ABS Plastic. They look factory-installed but can scrape loudly on speed bumps.
Expensive kits ($150+) are Flexible Urethane. They bend when you hit a curb, making them indestructible in winter.
🚧 Watch Your Curbs! Rigid mud flaps hang lower than the car’s body. If you park too close to a high curb, the flap might scrape or even crack.
While you are checking your clearance, inspect your rims. If you’ve already kissed a curb, don’t worry. You can sand and paint it yourself. Check our guide on DIY Guide to Fixing Tesla Curb Rash to make your wheels match your new mud flaps.
Comparison: Which One to Buy?
We broke down the three main types of protection to help you decide.
| Feature | Tesla OEM ($40) | Basenor / ABS ($30) | Rally Armor ($150) |
|---|---|---|---|
| Material | Hard Plastic | Hard Plastic | Flexible Urethane |
| Protection Area | Low (Too Short) | High (Extended) | Maximum |
| Install Difficulty | Easy (Clips) | Easy (Clips + 1 Bolt) | Medium (Brackets) |
| Best For | Purists | Most Owners | Snow / Gravel Roads |
Step-by-Step Installation Guide
The best part about modern Model 3/Y mud flaps is that they require zero drilling. Tesla has pre-existing plastic rivets in the wheel wells that we can reuse or replace.
Tools You Need:
- Flathead Screwdriver (to pop clips).
- Microfiber Towel & Alcohol Wipe.
- The Mud Flap Kit (Usually comes with new push pins).
Step 1: The “Sandpaper” Prevention (Critical!)
Before you snap the mud flap on, you must protect the paint where the plastic flap touches the metal body. Over time, vibration will cause the flap to rub against the paint, grinding it down like sandpaper.
Many cheap kits do not include protection film. If you install hard plastic directly against your paint, dirt will get trapped in between and scratch the clear coat.
Solution: Apply a small strip of clear Paint Protection Film (PPF) or even clear electrical tape to the fender edge before installing the flap. This creates a sacrificial barrier between the plastic flap and your car’s paint.
Step 2: Pop the Old Clips
Turn your steering wheel fully to the left to access the right wheel well (and vice versa). Use your flathead screwdriver to pop out the two factory plastic rivets holding the wheel liner. They might break, but that’s okay—your new kit has replacements.
Step 3: The Rear Wheel Challenge
The front wheels are easy because you can turn them. The rear wheels don’t turn, leaving you with only 2 inches of space to work with.
🔧 Need More Room? If you are installing larger Rally Armor flaps or using a screwdriver that is too long, you might need to take the rear wheels off.
Lifting an EV isn’t like lifting a gas car. You need jack pads to protect the battery. Before you lift, read our essential safety guide on How to Jack Up a Tesla Model 3/Y Safely.
Align the new mud flap holes with the car’s holes. Push the new expansion clips in until they “click.” Give the flap a firm tug to make sure it is secure. Repeat for all four wheels.
Do Mud Flaps Reduce Range? (The Big Question)
This is the main reason people hesitate. Mud flaps break the smooth airflow around the wheels, creating drag. So, will you lose 20 miles of range?
In wind tunnel testing and real-world highway tests, adding 4 mud flaps reduces efficiency by about 0.5% to 1.0%.
On a 300-mile trip, you might lose 2-3 miles of range. Is saving $1.50 in electricity worth $1,500 in paint damage? We think the trade-off is absolutely worth it.
The Verdict: Which Kit Wins?
If you live in a city with occasional rain, save your money and get the Basenor or Spigen (ABS Plastic) kits. They look factory-installed and stop 90% of rocks.
If you live in a snowy region like Canada or drive on gravel roads, bite the bullet and buy Rally Armor. They are expensive, but they won’t crack when you hit a chunk of ice.
For purists who want everything original, you can check the Official Tesla Mud Flaps, but remember—they are often too short to protect the rear doors effectively.
Still unsure about longevity? Check out the long-term reviews on the Tesla Motors Club Forum to see how different brands hold up after 50,000 miles.
Frequently Asked Questions
Do I really need rear mud flaps on Model Y?
Technically, the front mud flaps are the most important because the front tires throw rocks at the rear doors. Rear mud flaps are mostly to protect the car behind you from your spray, not your own car.
Will rigid mud flaps scrape on speed bumps?
Yes. Since the Model 3/Y sits low, rigid plastic flaps often scrape on high speed bumps or steep driveways. This sounds terrible but usually doesn’t damage the car. Flexible flaps (urethane) solve this issue completely.
Can I go through a car wash with mud flaps?
Yes, most “Touchless” and standard car washes are fine. However, make sure the clips are fully pushed in. Loose flaps can be ripped off by the spinning brushes.
⚠️ Disclaimer:
GreenMountMotors does not manufacture these products. This review is based on independent testing and user feedback.
Installing third-party accessories is generally safe, but ensure they are secured properly to avoid them coming loose on the highway. We are not responsible for any paint damage caused by improper installation.