
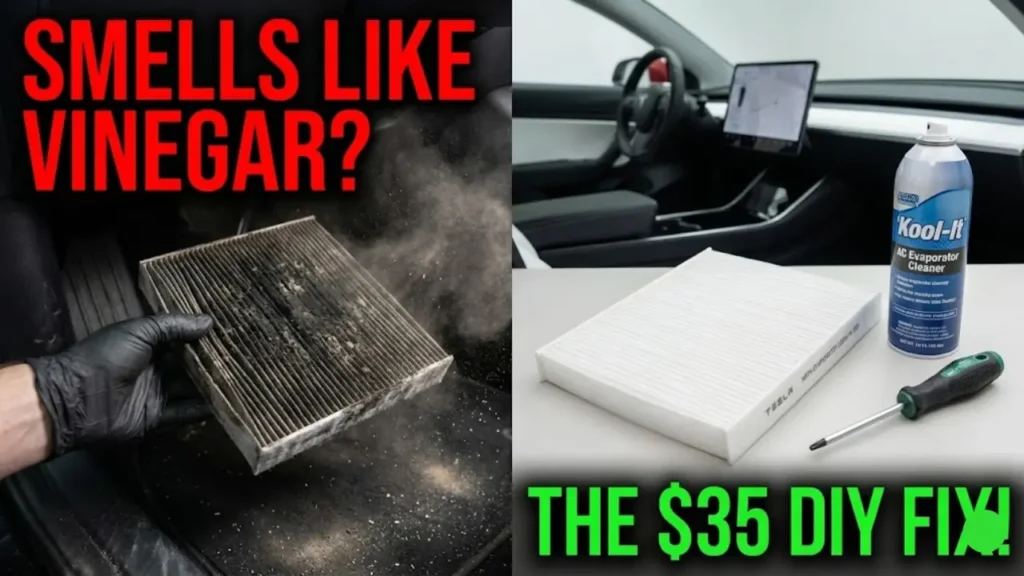
You unlock your Tesla Model 3 or Model Y, slide into the premium vegan leather seat, and take a deep breath, expecting that “new car” scent. Instead, you are hit with a pungent odor that smells like vinegar, old gym socks, or even rotten cheese.
It is embarrassing. You paid $50,000+ for the most advanced car on the road, yet it smells like a high school locker room. You are not alone. This is widely known in the community as the “Tesla Gym Bag Smell.”
The good news? Nothing died in your vents. The bad news? It won’t go away on its own. In this comprehensive guide, we will teach you the definitive Tesla AC smell fix, saving you the $150+ that the Service Center charges for the exact same 30-minute procedure.
Before we proceed, sniff carefully.
1. Vinegar / Cheese / Socks: This is Mold/Bacteria. Safe to fix yourself using this guide.
2. Burning Plastic / Sulfur / Rotten Eggs: This could be a melting component, battery issue, or 12V failure. Do not attempt a DIY fix. Schedule service immediately.
Why Does My Tesla Smell Like Vinegar?
If your Tesla Model 3 smells like vinegar, you aren’t a victim of bad luck; you are a victim of physics and design.
Unlike traditional cars where the AC evaporator is easily accessible and drains quickly, the Model 3 and Model Y have a deeply buried evaporator coil. The design makes it difficult for condensation (water) to drain out completely after you park.
When you run the AC, the coils get cold and wet. When you park the car in a hot garage, that trapped moisture combines with dust and pollen on the filters. This warm, dark, damp environment is the perfect luxury hotel for bacteria and mold. The “Vinegar” smell is actually the metabolic waste (gas) released by this mold.
The “Cabin Overheat” Connection
Many owners unknowingly make this problem worse by overusing protection features. Running “Cabin Overheat Protection” (without A/C enabled) simply blows warm, humid air across the filters for hours, accelerating mold growth.
If you suspect your climate settings are acting up or contributing to moisture buildup, check out our guide on Tesla Cabin Overheat Protection Issues to ensure your system isn’t trapping excess humidity unnecessarily.
Why Changing Filters IS NOT Enough
Here is the biggest mistake people make: They buy new filters, install them, and 3 days later… the smell comes back.
Why? Because the mold isn’t just on the paper filters; it is living on the aluminum evaporator coils deep inside the dash. If you replace the filters but don’t kill the colony on the coils, the new filters will get infected immediately.
In the next section, we will list the exact tools and cleaner spray you need to perform the “Deep Clean” surgery. Don’t worry, it costs less than $35.
The $30 Fix vs. The $150 Bill
Before we dirty our hands, let’s talk numbers. If you open your Tesla App and request service for “AC Odor,” the estimate will shock you.
The typical Tesla Model Y cabin air filter replacement cost at a Service Center ranges from $130 to $180 (Labor + Parts). The worst part? They often skip the “Deep Clean” foam step and only swap the filters, meaning the smell returns in weeks.
By doing it yourself, you pay for parts only. Here is the breakdown:
The “Smell Killer” Toolkit
To properly clean Tesla evaporator coils, you need more than just filters. Gather these four items before you start. You can find them on Amazon or local auto parts stores.
-
✓
1. T20 Torx Screwdriver: Essential. The screw holding the filter cover is a specific “Torx” star shape, not a regular Phillips head.
-
✓
2. Plastic Pry Tool: To pop off the plastic trim panels without scratching your interior or breaking clips.
-
✓
3. Evaporator Cleaner Foam (The Secret): Look for a product like “Kool-It” or “Lubegard”. This pressurized foam is the only thing that kills the mold deep inside.
-
✓
4. HEPA Filters (Set of 2): Ensure you buy a set of TWO. The Model 3/Y uses two stacked filters. Don’t just buy one!
The filters are located in the passenger footwell, deep against the center console. You will need to kneel outside the car and lean in. We recommend putting a towel or knee pad on the ground to save your knees during this 20-minute job.
Got your tools ready? Great. Now, let’s perform surgery on your car. In the next section, we will walk you through the Kool-It Tesla cleaning guide step-by-step, ensuring you don’t break any trim clips.
Step-by-Step: How to Replace & Clean
Follow these steps carefully. The process is identical for both Model 3 and Model Y.
In the passenger footwell, you may see thick Orange Cables. These are High Voltage lines. DO NOT touch, pull, or spray cleaner on these orange cables. You only need to work on the black plastic box (HVAC unit) next to them.
Step 1: Expose the Patient
Move the passenger seat all the way back. Remove the floor mat. Use your pry tool to gently pop off the side trim panel on the center console (it’s held by 4 clips). Peel back the carpet slightly to reveal the filter cover.
Step 2: The Tricky Screw
Locate the vertical rectangular cover. There is a single T20 Torx screw at the top (sometimes bottom on older models). Unscrew it. Be careful not to drop it behind the carpet! Remove the cover plate.
Step 3: Remove Old Filters
You will see two pull-tabs. Pull the top filter out first, then slide the bottom filter up and pull it out. Prepare to be disgusted—they will likely be gray/black and damp.
Step 4: The “Kool-It” Foam Injection
This is the step Tesla Service performs but most YouTubers skip. New filters alone won’t kill the mold on the metal.
- Shake your can of Evaporator Cleaner (Kool-It).
- Insert the long tube into the empty filter slot. Push it to the left (towards the center of the car) where the metal coils are.
- Spray the entire can while moving the tube up and down to cover the coils.
- Wait 15 minutes. The foam will dissolve the mold and drain out underneath the car.
Step 5: Install New Filters
Check the airflow arrows on your new HEPA filters. The arrow should point INWARDS (towards the back of the car).
Insert the first filter, slide it down to the bottom. Then insert the second filter on top of it. Reattach the cover, screw in the T20 screw, and snap the trim panel back.
Once finished, run your AC on “High” with windows open for 5 minutes to dry out any remaining foam residue. Just like in our Tesla Car Wash Mode Guide, keeping your car clean (inside and out) is key to longevity.
Now that the smell is gone, how do we make sure it never comes back? In the final section, we will share a hidden software setting that prevents mold from growing again.
How to Prevent the Smell from Returning
You’ve done the hard work. Now, let’s make sure you never have to smell that “gym bag” odor again. Tesla has released software updates to help, but you need to change your habits slightly.
1. Enable “Cabin Overheat” with Caution
As mentioned earlier, running Cabin Overheat Protection without A/C (Fan Only) in humid climates pumps moisture into the filters. If you live in a humid area, either set it to “On with A/C” or turn it off completely if parked in a garage.
2. The “Auto-Dry” Feature (Software)
Tesla pushed a firmware update that automatically runs the blower fan for 15-20 minutes after you park if the A/C was used. This dries the evaporator.
If you hear your car humming while parked, do not panic. It is not broken. However, this does use a small amount of energy. If you notice unexpected range loss, check our guide on Tesla Phantom Drain: What is Normal? to distinguish between this healthy drying process and actual battery drain issues.
Before you arrive home, turn off the A/C (compressor) but keep the fan running on “High” for the last mile. This manually blows the water off the coils before the car sits still. It’s the single most effective way to prevent mold.
Frequently Asked Questions
Generally, no. Tesla classifies filters and odors as “wear and tear” maintenance items, similar to tires or wiper blades. You will likely have to pay out of pocket unless the car is brand new (under 1-2 months).
2. How often should I change the cabin filters?Tesla recommends every 2 years, but if you live in a humid climate or a city with pollution, we strongly recommend changing them once a year to avoid the vinegar smell.
3. Are expensive HEPA filters worth it?Yes. Standard paper filters stop dust, but HEPA filters with activated carbon (charcoal) actively absorb odors and VOCs. For a few extra dollars, they are a massive upgrade.
For official diagrams and part numbers, always refer to the Tesla Official Do-It-Yourself Guide.
Pingback: Tesla Dog Mode Guide: Safety, Screen Message & "Not Working" Fix (2026) - greenmountmotors.com
Pingback: 10 Common Tesla Model 3 Problems (2026): Reliability & Fixes Guide - greenmountmotors.com