
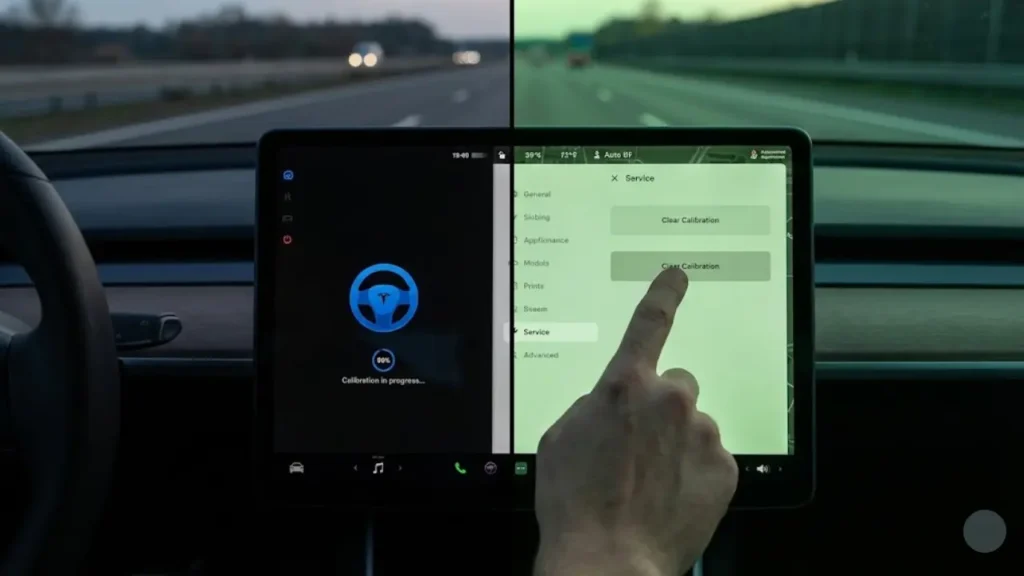
You just picked up your new Tesla Model Y, or perhaps you just drove out of the Safelite lot after a windshield replacement. You merge onto the highway, double-tap the stalk to engage Autopilot, and… nothing happens.
Instead, you see a small steering wheel icon with a blue circle loading bar and the message: “Calibration in progress.”
You drive 20 miles. It hits 98%. You drive another 10 miles. It hits 99%. Then, it stops. You drive for three more days, and it is still stuck at 99%.
This is one of the most common complaints among US Tesla owners. Without calibration, your expensive Full Self-Driving (FSD) package, Autosteer, and even basic safety features like Emergency Braking won’t work. In this guide, we will fix the Tesla camera calibration stuck issue and get your blue steering wheel back.
When calibration is stuck, the following features will be disabled:
• Autopilot / FSD
• Cruise Control (TACC)
• Automatic Lane Changes
• Tesla Park Assist & Visualization
What Exactly is Calibration?
Many owners think “calibration” is just the computer loading software, like a Windows update. It isn’t.
Calibration is a learning process. Your Tesla has 8 external cameras. Due to manufacturing tolerances or windshield glass variations, every camera points in a slightly different direction (by fractions of a millimeter).
During this phase, the car’s Neural Network is watching the road lines and comparing them across all cameras to calculate the exact “Pitch, Yaw, and Roll” of each lens. It is teaching itself how to see depth.
In perfect conditions (clear highway, well-marked lanes), it should take 20-25 miles (32-40 km). If you have driven over 100 miles and it is still pending, the process is officially “stuck.”
Why Does It Get Stuck at 99%?
The progress bar is not linear. It usually zooms from 0% to 90% in the first 10 minutes. The last 1% is the hardest.
If your Tesla calibration is stuck at 99, it means the computer has successfully aligned most cameras but is struggling with one specific camera or angle. Common culprits include:
- Poor Lane Markings: Faded paint on rural roads confuses the sensors.
- Lack of Contrast: Driving on snow, in heavy rain, or flat gray concrete without visible lines.
- Physical Blockage: A layer of dirt, ice, or even a bad tint job on the B-pillar cameras.
So, do you just keep driving and hoping? No. If it’s been stuck for days, driving more won’t fix it. You need to perform a “Force Reset.” In the next section, we will show you the hidden service menu button that clears the bad data.
Step 1: The “Hardware” Check (Do This First)
Before you touch the screen to reset the software, you must ensure the hardware can “see.” If your Tesla Autopilot cameras are unavailable due to dirt, resetting the system will just put you back in the same 99% loop.
Grab a clean microfiber cloth and some glass cleaner (ammonia-free). You need to inspect and clean these 3 key areas:
-
✓
1. The Forehead (Windshield Cameras): Look at the camera housing at the top center of your windshield. Ensure there is no bird poop, sap, or sticker residue blocking the lenses.
-
✓
2. The B-Pillars (Side Cameras): These are the cameras between the front and rear doors. They are notorious for getting foggy. Check for condensation inside the glass.
-
✓
3. The Fender Cameras: Located near the front wheels. These get covered in road salt and mud easily. Wipe them gently.
Step 2: How to Clear Camera Calibration
Once the eyes are clean, it’s time to wipe the brain. If you have been stuck at 99% for more than 50 miles, the system has essentially “crashed” its learning process. You need to force it to start over.
Follow these exact steps to clear camera calibration on Tesla:
- Park the car on a flat surface and put it in PARK.
- On the touchscreen, tap Controls (Car Icon).
- Go to the Service menu.
- Tap on Camera Calibration.
- You will see a button labeled “Clear Calibration”. Tap it.
- Confirm by tapping Yes on the popup warning.
What happens next?
The screen might flicker, and the Autopilot/FSD visualization will disappear. The steering wheel icon will turn into the blue loading circle again (0%).
After pressing “Clear Calibration,” we recommend performing a standard scroll-wheel reboot (hold both scroll wheels for 10 seconds). This ensures the computer RAM is fresh before you start the calibration drive.
Now that the system is reset to 0%, you are ready to drive. But don’t just drive anywhere! In the next section, we will reveal the “Golden Driving Strategy” that helps the car finish calibration in just 10-15 miles instead of 100.
The “Golden Drive” Strategy: Finish in 15 Minutes
Many owners drive aimlessly around their neighborhood, wondering why the bar isn’t moving. The Tesla computer doesn’t care about distance; it cares about quality data.
To go from 0% to 100% in the shortest time possible, find a multi-lane highway (Interstate) and follow these rules:
- Middle Lane is King: Drive in the middle lane of a highway. This allows the side cameras to see lane markers on both sides simultaneously.
- Speed Matters: Maintain a steady speed between 50-65 mph (80-105 km/h). Stop-and-go traffic provides poor data.
- Visual Contrast: The cameras need “anchors.” Having other cars driving alongside you actually helps the Neural Network calculate depth faster.
- Avoid curves: Try to find a long, straight stretch of road.
Conditions to Avoid (The “Calibration Killers”)
Do not attempt to calibrate cameras after windshield replacement in these conditions, or it will get stuck again:
- Tunnels: Loss of GPS and lighting resets the confidence score.
- Heavy Rain/Snow: If the wipers are on high speed, calibration pauses.
- Direct Sun Glare: Driving directly into a sunrise or sunset blinds the front cameras.
Stuck AGAIN after Reset? (The Hardware Fault)
If you cleared the calibration, drove 100 miles on a perfect highway, and it stuck at 99% again, you likely have a physical alignment issue.
This is extremely common after a windshield replacement by third-party shops (like Safelite). If the technician didn’t snap the triple-camera housing back into the bracket perfectly, the “Pitch” angle might be off by 1 degree.
The Test: Look closely at the front camera housing from outside. Is it loose? Is it sitting flush against the glass? If it is crooked, the software cannot compensate for it. You will need to return to the glass shop or visit Tesla Service.
Sometimes, a glitchy software version can also cause this loop. Before booking service, check if you have a pending update stuck in limbo. Read our guide on Tesla Software Update Stuck at 50% or 100% to ensure your firmware is healthy.
Now that you know how to drive it, let’s wrap up with some crucial FAQs regarding FSD and costs in the final section.
Special Note for FSD (Full Self-Driving) Users
If you subscribe to FSD (Supervised), you might notice that your calibration bar moves slower than your friend’s standard Model 3. This is normal.
FSD requires a much higher “Confidence Score” from the Neural Network than basic Autopilot. While basic Autosteer might unlock at 98% confidence, FSD might stay disabled until it hits 99.9%. If you are stuck, do not panic; the system is just being extra cautious for safety.
When to Visit the Service Center?
If you have cleaned the cameras, cleared the calibration, drove 100 miles on a highway, and it is still broken, you likely have a hardware failure.
Often, a faulty repeater camera (blind spot camera) can cause the entire system to hang. If you also notice issues with your security recordings, check our guide on Tesla Sentry Mode Not Recording to diagnose if a specific camera has died.
Warranty: Free (if it’s a software/hardware defect).
Out of Pocket: $175 – $250 (General Diagnostics fee).
Note: If the issue was caused by a bad window tint or aftermarket windshield, Tesla will charge you to fix it.
Frequently Asked Questions
Technically, yes, if the road is well-lit by streetlights. However, it will take much longer. The cameras rely on visual contrast, so a bright, sunny day provides the fastest data collection.
2. Is it safe to drive while calibrating?Yes, the car is perfectly safe to drive manually. However, active safety features like Automatic Emergency Braking and Lane Keep Assist may be disabled or limited until the process hits 100%.
3. What is “Tesla Body Shop Mode” calibration?This is an advanced service menu option used by collision centers after replacing a bumper or sensor. Do not touch this unless you have the specific calibration targets (checkerboards) set up in your garage, or you could mess up the sensors permanently.
According to the IIHS (Insurance Institute for Highway Safety), properly calibrated camera systems are critical for the effectiveness of modern crash-avoidance technology.
Pingback: Tesla Phantom Braking Explained: Why It Happens & How to Stop It (2026) - greenmountmotors.com