
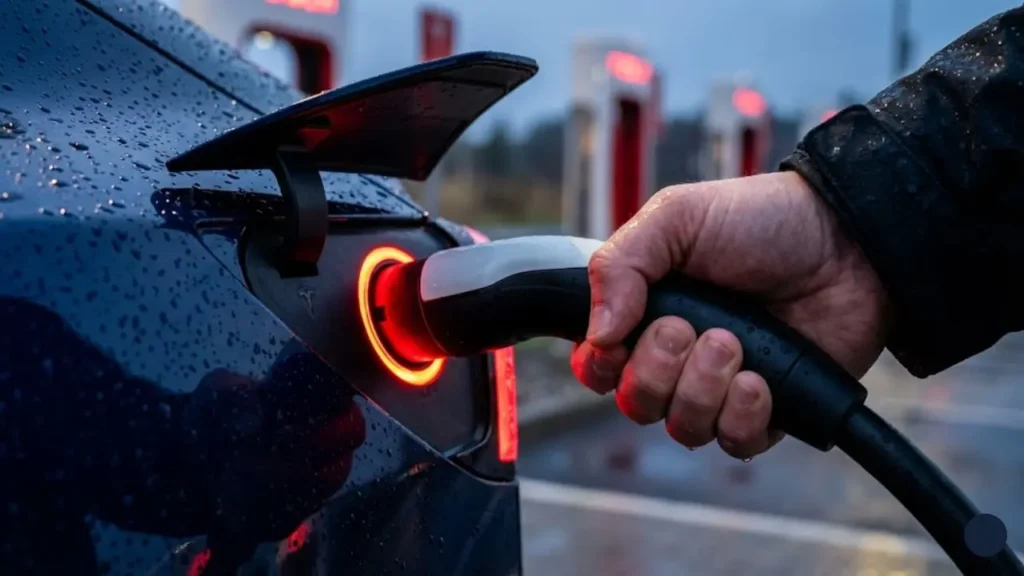
It is every EV owner’s nightmare. You are at a busy Supercharger, you have finished charging, and you press the button on the handle to unlock it. Nothing happens. You pull gently—it’s stuck solid. The light on the charge port might be solid red or amber, and panic starts to set in as people wait in line behind you.
Before you brace your foot against the bumper and pull with all your might, stop immediately. The Tesla charge port latch stuck issue is common, but handling it wrong can cost you over $600 in repairs.
The locking pin is made of plastic or metal. If you yank the cable while it is locked, you will snap the locking mechanism or damage the high-voltage housing.
The “Secret” Emergency Release Cable
Tesla engineers knew that electronics fail (or 12V batteries die), so they designed a mechanical “backdoor” to unlock your charger. This is a physical cable hidden inside the car that bypasses the software entirely.
If you are searching for the Tesla charger stuck in port manual release location, follow these steps strictly. Note: This assumes you are in a safe location.
Open your rear trunk (boot). Look at the left-hand side wall liner.
Step-by-Step Manual Unlock:
- Step 1: Open the trunk. On the left side, look for a small cutout or a perforated section in the fabric liner (near the taillight area).
- Step 2: In newer Models, there is a visible pull tab. In older models, you might need to reach through a small grille.
- Step 3: Locate the small loop/wire (usually thin and black).
- Step 4: While holding the charging handle with one hand (to relieve tension), gently pull the loop towards the front of the car.
- Step 5: You should hear a mechanical “click” as the pin retracts. Pull the charger out immediately.
Warning: The manual release is designed for emergencies only. Frequent use can wear out the cable mechanism. If you got the cable out, do not plug it back in until you troubleshoot why it got stuck.
But what if you don’t want to crawl into your trunk just yet? In most cases, the latch isn’t broken—it’s just a software glitch. In the next section, we will show you 3 fast ways to unlock the port using just your phone screen.
Before You Pull the Cord: Try These Software Hacks
Using the manual release cable should be your last resort. In 90% of cases, the Tesla charge port latch stuck error is simply a communication glitch between the charging handle and the car’s computer. The car “thinks” electricity is still flowing, so it keeps the latch locked for safety.
Before you climb into the trunk, try these three software overrides to force the car to release the cable.
1. The “Stop Charging” Rule
This sounds obvious, but it is the most common mistake. You cannot unlock the latch while high-voltage current is flowing. The car physically prevents it to avoid arcing.
1. Open the Tesla App.
2. Tap “Stop Charging” first.
3. Wait 5 seconds for the “Clunk” sound (contactors opening).
4. Then tap “Unlock Charge Port”.
2. The “Open Door” Trick (Wake-Up Call)
Sometimes, the car is in a “semi-sleep” state and isn’t recognizing the button press on the charging handle, especially if your phone key Bluetooth is lagging.
The Fix: simply open a rear door. This action forces the vehicle to “Wake Up” fully. Once the car is awake, try pressing the button on the charging handle again. You’d be surprised how often this simple physical action clears the glitch.
3. The Computer Reboot (The Holy Grail)
If the charge port light is unresponsive (no color) or stuck on red, the Vehicle Controller might be frozen. Just like a smartphone, a quick reboot can fix frozen hardware drivers.
Perform a standard “Scroll Wheel Reset” while sitting in the driver’s seat. This will not stop the charging immediately, but it refreshes the software controlling the latch.
If you have never done this or are worried about doing it safely, follow our detailed Tesla Black Screen Restart Guide. Once the screen comes back on (about 60 seconds), try unlocking the port again via the screen.
If the software commands failed and the manual cable worked, but the issue keeps happening, your problem might be environmental. Is it freezing cold outside? Or is the adapter stuck inside? In the next section, we tackle the “Frozen Latch” and the “Stuck J1772 Adapter.”
Scenario A: The Frozen Latch (Winter Woes)
If it is freezing outside and you cannot hear the “mechanical click” when you press unlock, the locking pin is likely frozen shut by ice. This is a common Tesla charge port frozen winter fix scenario.
1. The “Defrost” Method (Best Practice)
The safest way to unfreeze the port is heat. Open your Tesla App, go to Climate > Defrost Car. This cranks the heat to max and warms up the charge port inlet via the battery’s thermal management system.
This process consumes significant energy. If you are concerned about losing range while parked in the cold, check our guide on minimizing losses here: Tesla Phantom Drain & Winter Battery Tips.
2. The “Karate Chop” (Percussive Maintenance)
If you don’t have time to wait for the heater, Tesla officially recommends a physical solution. It sounds primitive, but it works.
Make a fist and gently but firmly hit the area around the charge port door (the reflector part), using the fleshy part of your hand. Do NOT hit the door itself or the light. The vibration helps break the thin layer of ice on the locking pin mechanism.
Scenario B: The Adapter is Stuck (J1772 Issue)
If you use public charging stations (like ChargePoint or Blink), you use the small black J1772 adapter. A common panic moment happens when you pull the charging handle, and the handle comes off… but the Tesla adapter stuck in charge port remains locked inside.
This happens because the car locks onto the adapter, not the charging gun. If the adapter is stuck, do NOT try to pry it out with a screwdriver.
1. Unlock the port via the car screen or app (the T light should turn White/Blue).
2. Hold the stuck adapter with one hand.
3. Re-insert the charging gun into the adapter just a little bit.
4. Pull both out together simultaneously.
Note: If the light is green, the car is still holding the adapter. You must stop charging and unlock it first.
Now you know how to fix the issue when it happens. But how do you prevent it from happening again? In the final section, we will discuss preventive maintenance and the “WD-40” question.
Prevention: The “WD-40” Hack (Do It Right)
If your charge port latch sounds “crunchy” or struggles to move, it is likely dry. A little lubrication goes a long way, but you must use the right chemical.
Do NOT use standard WD-40 (the blue can). It is oil-based, attracts dust, and can degrade plastic/rubber seals over time.
The Fix: Use WD-40 Specialist Silicone Spray (or any generic Silicone lubricant). Spray a tiny amount on the locking pin mechanism inside the port. Silicone is water-resistant and safe for rubber seals.
The Hidden Hardware Failure: Dead 12V Battery
The locking mechanism is an electrical actuator. It needs power to unlock. If your car is completely dead and the screen won’t turn on, your low-voltage battery has likely failed.
If the latch is stuck AND the car doors are sluggish or the screen is black, jump-starting the 12V battery usually releases the charger instantly. To verify if you need a new battery, check our guide on Tesla Battery Replacement Cost & Warning Signs.
Final Verdict: Emergency Checklist
Quick Recap
- Don’t Panic: Stop the charging session in the App first.
- Try Software: Use the “Unlock” button on screen or Voice Command.
- Emergency: Use the Manual Release Cable in the trunk (left side).
- Winter: Defrost the car or gently tap the port area.
Frequently Asked Questions
1. Why is my Tesla charge port light red?A solid red light indicates a hardware fault (latch failure) or that the charging cable is not fully inserted. Try removing and re-inserting the cable firmly. If it persists, restart the car.
2. Can I drive with the Tesla charge port open?Yes, but it is not recommended. The car will likely beep at you and limit speed. The charge port door is designed to close automatically. If it stays open, the motorized hinge might be broken.
3. How much does it cost to fix a broken Tesla charge port?If the motorized latch or ECU fails out of warranty, the Tesla charge port broken cost is typically between $400 and $600 (parts and labor) at a Tesla Service Center.
4. Will the manual release cable damage my car?No, it is designed for this purpose. However, it is an emergency mechanism. Using it daily can stretch the cable or wear out the release spring, so use it only when software unlocks fail.